
After understanding AWS IAM and the global infrastructure, it’s time to get hands-on with AWS compute resources. Amazon EC2 (Elastic Compute Cloud) is the foundation for running servers, applications, and services in the cloud. On Day 6, we’ll walk through launching your first EC2 instance, explain the settings in detail, and provide tips to become an expert in AWS compute.
At Curiosity Tech, our workshops emphasize hands-on learning, enabling beginners to not just launch instances but understand the architecture behind them.
1. What is Amazon EC2?
Amazon EC2 provides resizable virtual servers in the cloud, allowing you to deploy applications without managing physical hardware.
Key Features:
- Flexible instance types for compute, memory, and storage needs
- Multiple operating systems: Linux, Windows, and more.
- Integration with other AWS services (S3, RDS, VPC, IAM).
- Auto-scaling and elastic load balancing for high availability.
Analogy: Think of EC2 as renting a virtual computer in the cloud, where you can install software, host websites, and run applications, paying only for the resources you use.
2. Preparing for Your First EC2 Launch
Before launching your instance, ensure:
- AWS Free Tier account is active.
- IAM user with EC2 access is created (never use root).
- Key pair created for secure login.
- VPC and subnet are ready (default VPC can be used for beginners).
Curiosity Tech Insight: Beginners often skip creating a key pair and face login issues. Our training emphasizes proper key management from the start.
3. Step-by-Step Launch Guide
1 – Open EC2 Dashboard
- Navigate to AWS Console → EC2 → Launch Instance.
- Click “Launch Instance” to start the wizard.
2 – Choose an Amazon Machine Image (AMI)
- Amazon Linux 2 (Free Tier eligible) is recommended for beginners.
- Other options: Ubuntu, Windows Server.
3 – Choose Instance Type
| Instance Type | vCPU | Memory | Free Tier Eligible | Use Case |
| t2.micro | 1 | 1 GB | Yes | Small web app, test environment |
| t3.micro | 2 | 1 GB | Limited | Lightweight workloads |
| m5.large | 2 | 8 GB | No | Production apps, medium traffic |
Tip: Always select Free Tier eligible to avoid charges during learning.
4 – Configure Instance
- Number of instances: 1 (for beginners).
- Network: Default VPC.
- Subnet: Default subnet in your region.
- Enable Auto-assign Public IP for SSH access.
5 – Add Storage
- Default: 8 GB EBS (Elastic Block Store).
- Increase storage based on requirements.
- Choose General Purpose SSD (gp3) for most workloads.
6 – Add Tags
- Add tags for resource identification.
- Example: Name = MyFirstEC2
7 – Configure Security Group
- Security groups act as virtual firewalls.
- Allow SSH (port 22) for Linux or RDP (port 3389) for Windows.
- Restrict access to your IP for security.
8 – Review and Launch
- Confirm all settings.
- Select existing key pair or create new key pair for login.
- Download .pem file securely.
4. Connecting to Your Instance
Linux Instance (SSH)
ssh -i “MyKeyPair.pem” ec2-user@<Public-IP>
- Set .pem file permissions: chmod 400 MyKeyPair.pem.
Windows Instance (RDP)
- Use the key pair to decrypt the Administrator password.
- Connect via Remote Desktop client.
Expert Tip: Never share key pairs. For production, use IAM roles for EC2 instead of embedding credentials.
5. Hierarchical Diagram of EC2 Environment
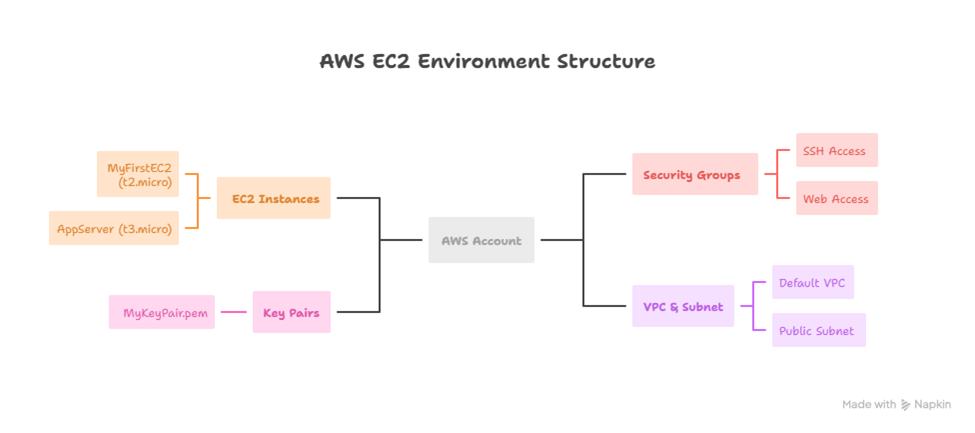
This helps beginners visualize the relationship between EC2, security, and networking components.
6. Best Practices for Beginners
| Practice | Reason |
| Start with Free Tier instances | Avoid unexpected charges |
| Use IAM roles, not credentials | Secure service access |
| Monitor CloudWatch metrics | Track performance and issues |
| Tag resources | Easy management and auditing |
| Regularly stop/terminate unused instances | Cost optimization |
At Curiosity Tech, learners simulate real projects, launching multiple instances, connecting them, and configuring security groups to understand real-world deployment workflows.
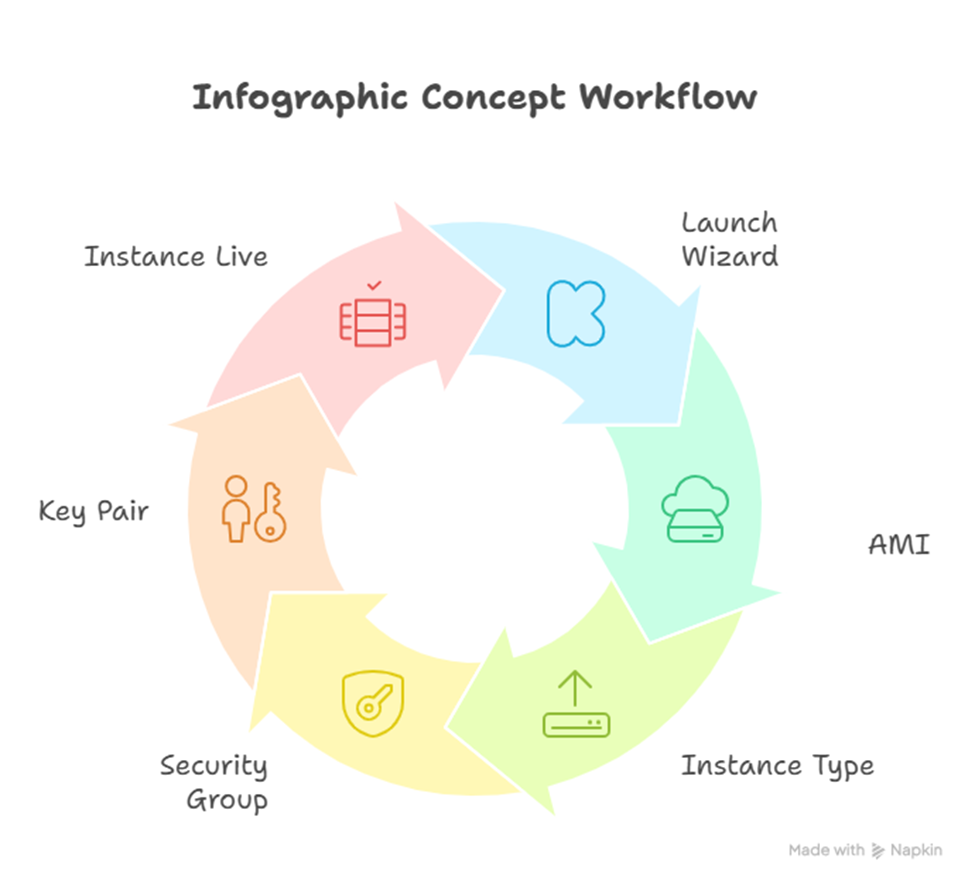
7. Infographic Concept
8. Path to Expertise
- Start with launching single instances.
- Experiment with different AMIs and OS configurations.
- Learn Elastic IP, EBS snapshots, and backups.
- Configure Auto Scaling and Load Balancers for high availability.
- Integrate with CloudWatch for monitoring and alerts.
Curiosity Tech Approach: Learners gradually move from single-instance setups to full multi-AZ, auto-scaled environments, gaining confidence in cloud infrastructure management.
Conclusion
Launching your first EC2 instance is more than a technical exercise—it’s the first step into the AWS ecosystem. Understanding each configuration, security group, and key pair prepares you to build scalable, secure cloud applications.
Hands-on practice, combined with structured guidance like at Curiosity Tech, accelerates the journey from beginner to cloud engineer, ensuring that learners not only launch instances but also architect reliable cloud solutions.