Description
While Flask is great for lightweight projects, Django is the framework you turn to when you need a full-featured, enterprise-ready application. Known as the “batteries-included” Python framework, Django comes with authentication, ORM, admin panel, and more out of the box. In this blog, we’ll build a basic Django web application step by step and show how these features can help you scale quickly.
1. Why Choose Django for Your First App?
Django is designed for developers who want to move fast without reinventing the wheel. It saves you from writing repetitive code and focuses on security, scalability, and maintainability.
At Curiosity Tech, when students build their first Django app, they often feel empowered by how much Django handles automatically: from database operations to user login systems. This makes it the go-to framework for startups and enterprises alike.
2. Installing Django
Make sure you have Python and pip ready, then set up a virtual environment.
# Create virtual environment
python -m venv venv
# Activate environment
# Windows
venv\Scripts\activate
# Mac/Linux
source venv/bin/activate
# Install Django
pip install django
3. Creating a Django Project
Run the following command:
django-admin startproject myproject
This creates the project structure:
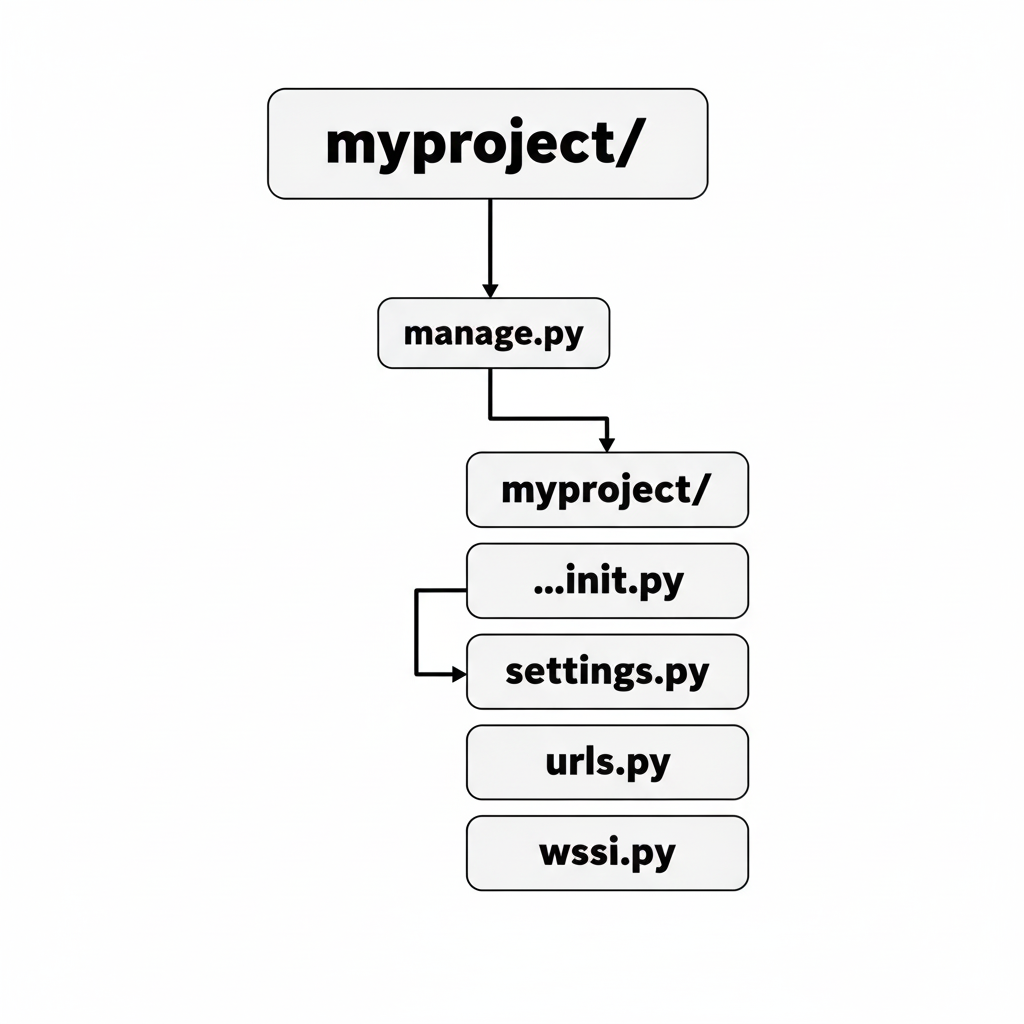
- manage.py → Utility for running project tasks.
- settings.py → Configuration file.
- urls.py → Routes (similar to Flask’s @app.route).
4. Running the Development Server
Navigate into your project folder and run:
python manage.py runserver
Visit http://127.0.0.1:8000/ in your browser.
You’ll see Django’s famous “Congratulations! It worked!” page.
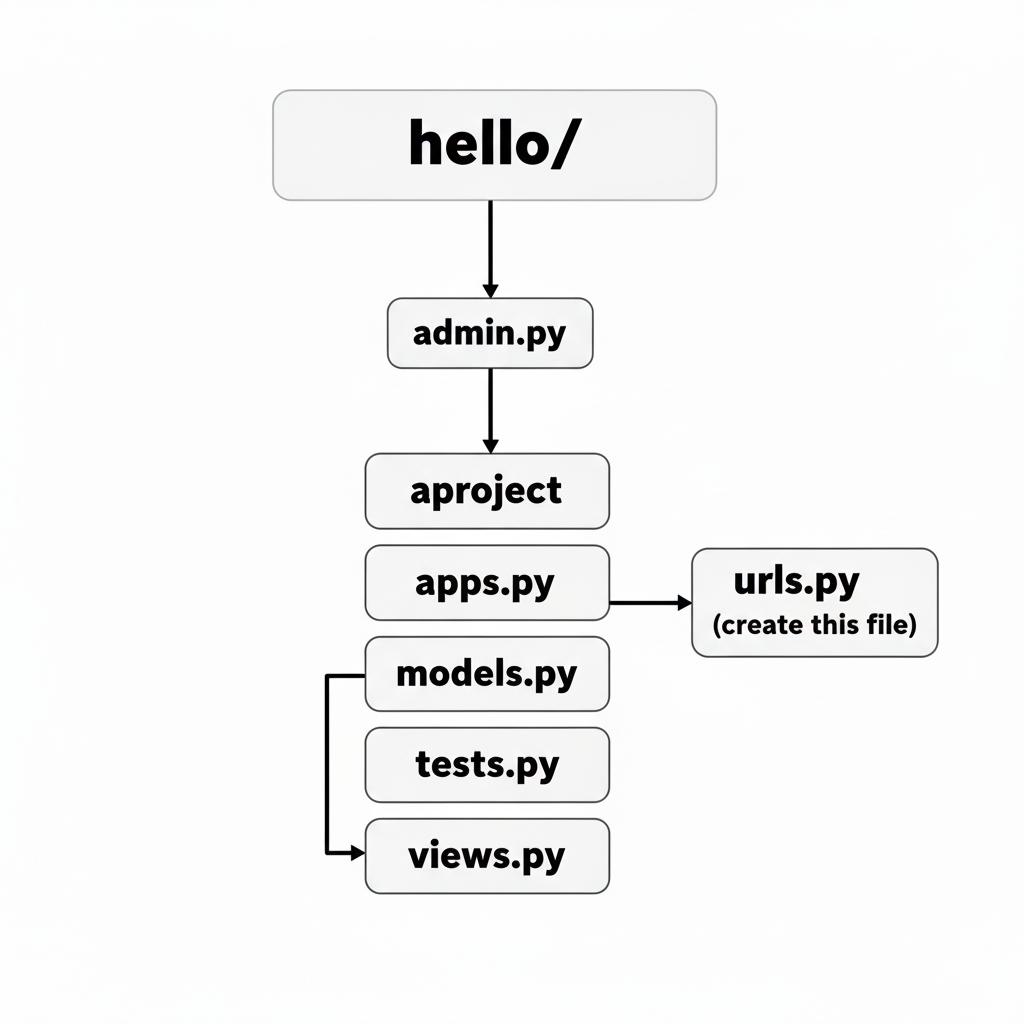
5. Creating a Django App
Inside the project, create your first app:
python manage.py startapp hello
This generates:
6. Writing Your First View
Open views.py inside the hello app and add:
from django.http import HttpResponse
def home(request): return HttpResponse(“Welcome to Your First Django Web App – Brought to you by CuriosityTech!”)
7. Mapping URLs
Inside hello/, create a file urls.py:
from django.urls import path
from . import views
urlpatterns = [
path(”, views.home, name=’home’),
]
Now, include this in your project’s main urls.py:
from django.contrib import admin
from django.urls import path, include
urlpatterns = [
path(‘admin/’, admin.site.urls),
path(”, include(‘hello.urls’)), # Connect hello app
]
Now visiting http://127.0.0.1:8000/ will show your custom page.
8. Django Admin Panel
Run migrations:
python manage.py migrate
python manage.py createsuperuser
Then log into the admin at http://127.0.0.1:8000/admin/ using your credentials.
Here you can manage models, users, and more without writing extra code.
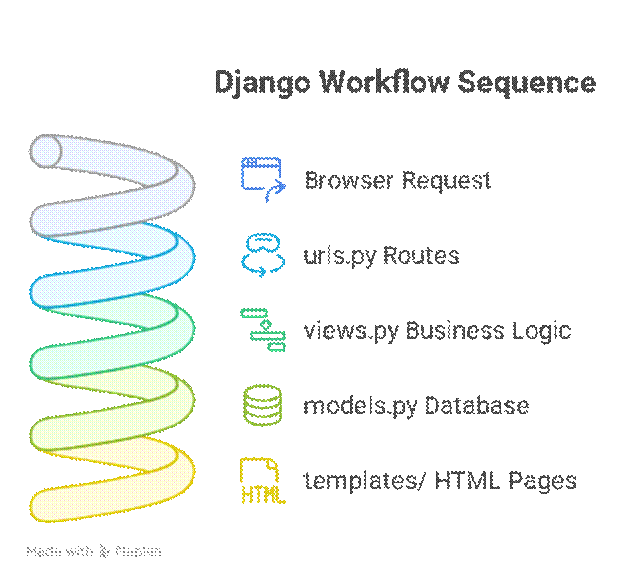
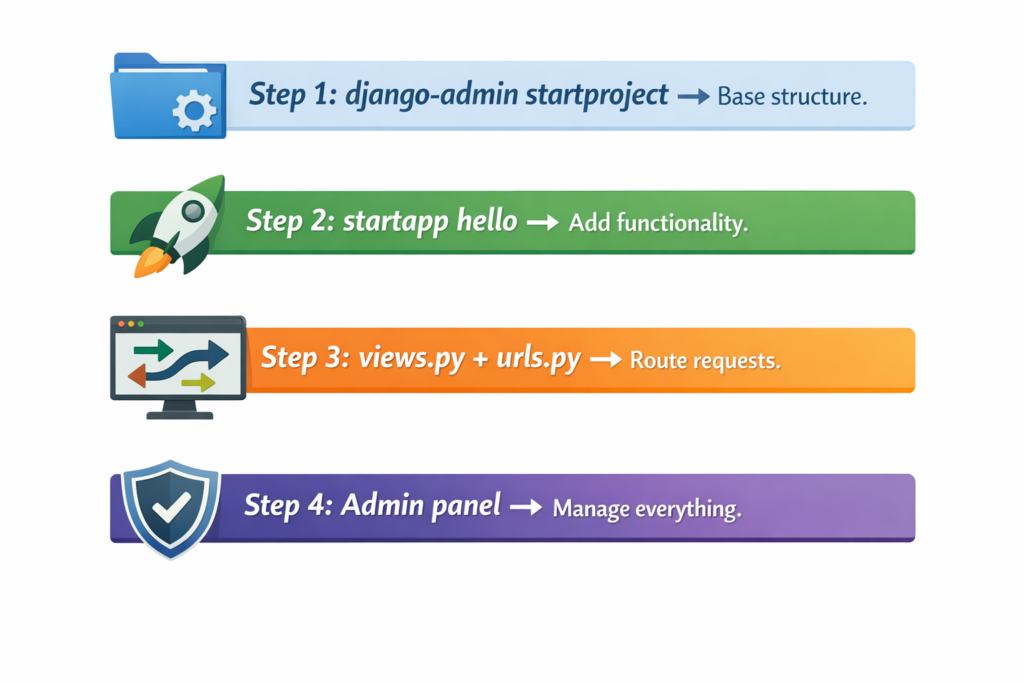
9. Hierarchical Diagram: Django Workflow
10. Real-World Abstraction
Think of Django as a smart city infrastructure:
- urls.py = Road signs telling you where to go.
- views.py = Offices doing the actual work.
- models.py = Databases storing important records.
- admin panel = City hall where managers control everything.
This holistic ecosystem is why companies like Instagram and Pinterest rely on Django.
11. Infographic Idea (Described)
A visual with:
12. CuriosityTech Insight
Many Curiosity Tech learners create their portfolio projects in Django, like an e-commerce platform, a blog app, or a student management system. Employers are impressed because Django apps demonstrate real-world readiness — from routing to admin management.
Conclusion
Django might feel heavier than Flask at first, but once you build your first app, you’ll appreciate its batteries-included approach. With just a few commands, you’ve built a web app that can scale into something massive. As you continue through this series, we’ll explore how Django connects with databases, templates, APIs, and frontends. With consistent practice (and support from communities like Curiosity Tech), you’ll soon master it.