Introduction
Push notifications have become an essential feature in mobile apps, allowing developers to engage users even when the app is not active. Whether it’s a messaging app alert, a promotional offer, or a system reminder, push notifications are critical for maintaining user retention and engagement. In the realm of cross-platform mobile development, implementing push notifications requires careful understanding of platform-specific services like Firebase Cloud Messaging (FCM) for Android and Apple Push Notification Service (APNS) for iOS, while using frameworks such as Flutter or React Native to write shared code.
This blog will provide an in-depth guide to setting up push notifications for both Flutter and React Native, covering conceptual underpinnings, practical examples, troubleshooting tips, and strategies to become an expert in push notification implementation.
Understanding Push Notifications
At its core, a push notification is a message sent from a server to a client device, without a request initiated by the user. It usually comprises:
- Title: Short description of the notification.
- Body: Main message content.
- Payload/Data: Additional data for handling actions within the app.
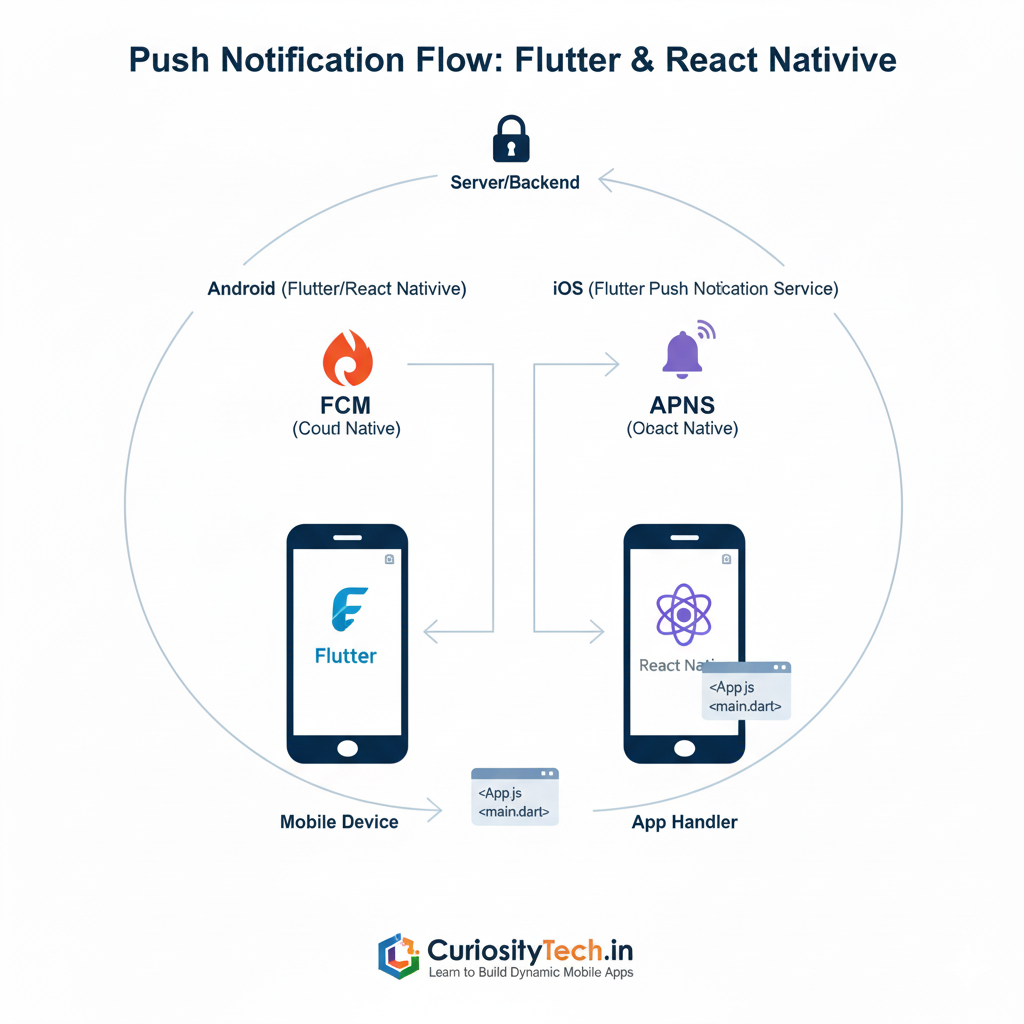
How Push Notifications Work
- Server-side triggers – Your backend server or cloud service (like Firebase) decides when and what to send.
- Push service – FCM for Android and APNS for iOS receive the request.
- Delivery to device – Device tokens or registration IDs are used to route messages.
- App handles notification – In foreground, background, or terminated state, apps can handle notifications differently.
Diagram: Push Notification Flow
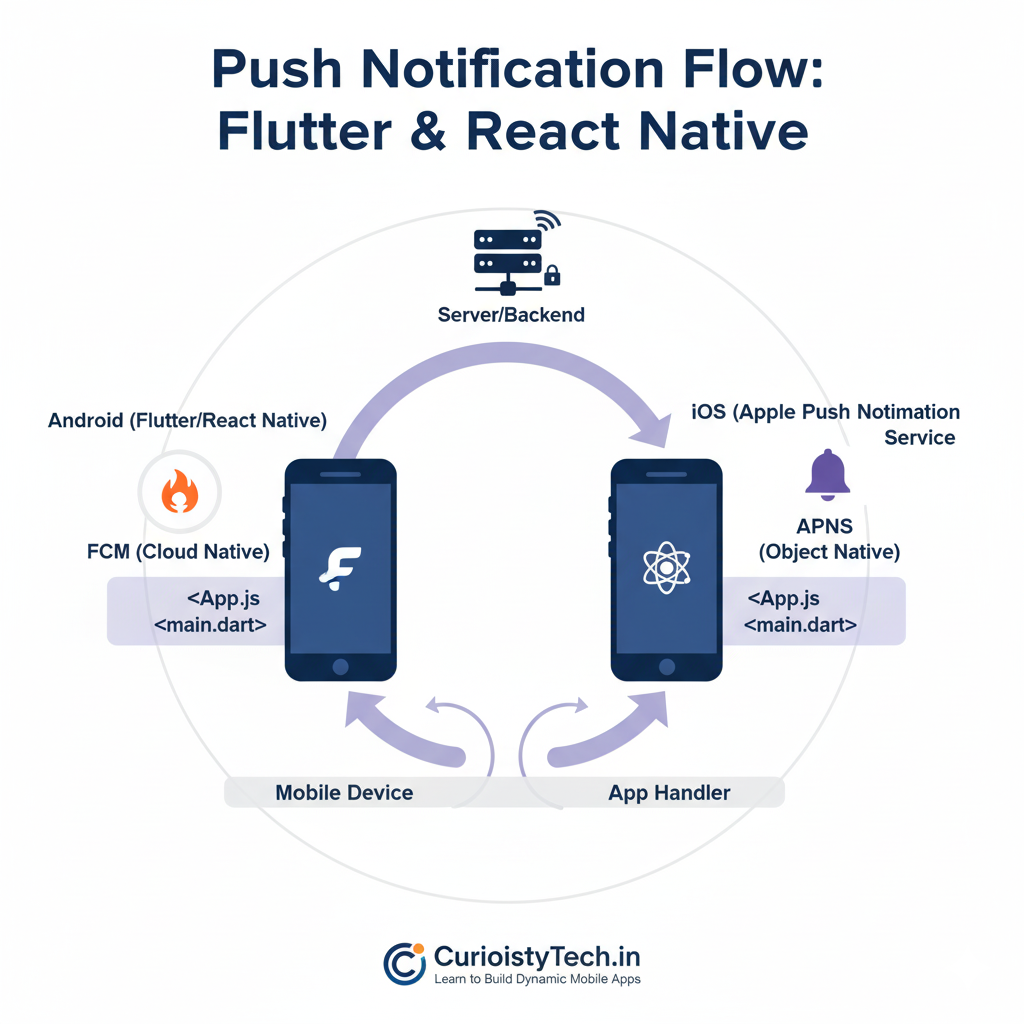
Understanding this flow is critical for designing a robust notification system.
Setting Up Push Notifications in Flutter
Flutter leverages the firebase_messaging package to integrate FCM. Here’s a step-by-step guide:
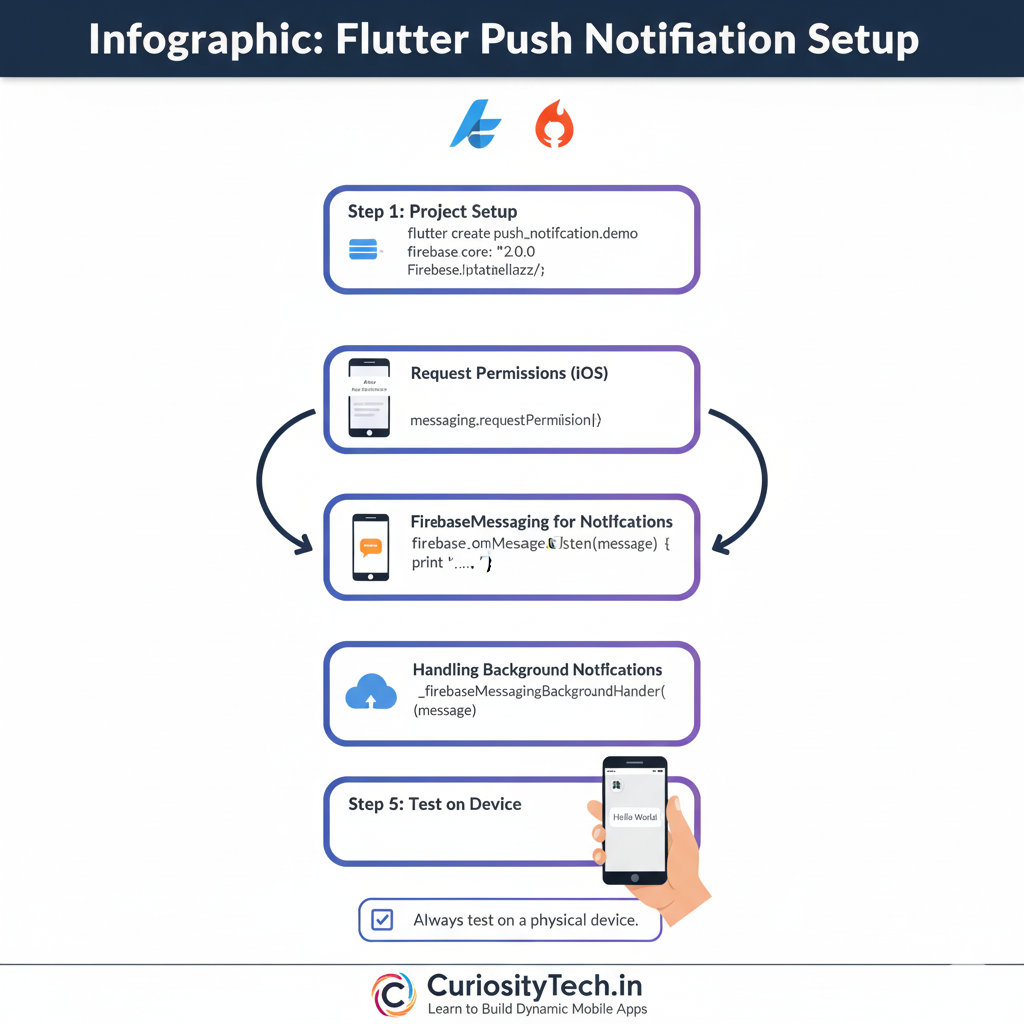
1. Project Setup
- Create a Flutter project:
flutter create push_notification_demo
- Add dependencies in pubspec.yaml:
dependencies:
firebase_core: ^2.0.0
firebase_messaging: ^14.0.0
- Initialize Firebase in main.dart:
void main() async {
WidgetsFlutterBinding.ensureInitialized();
await Firebase.initializeApp();
runApp(MyApp());
}
2. Request Permissions (iOS Specific)
FirebaseMessaging messaging = FirebaseMessaging.instance;
NotificationSettings settings = await messaging.requestPermission(
alert: true,
badge: true,
sound: true,
);
3. Listen for Notifications
FirebaseMessaging.onMessage.listen((RemoteMessage message) {
print(‘Received message: ${message.notification?.title}’);
});
4. Handling Background Notifications
Flutter allows background message handling using:
Future<void> _firebaseMessagingBackgroundHandler(RemoteMessage message) async {
print(‘Handling a background message: ${message.messageId}’);
}
FirebaseMessaging.onBackgroundMessage(_firebaseMessagingBackgroundHandler);
Pro Tip: Always test notifications on a physical device; emulators often have limitations.
Setting Up Push Notifications in React Native
React Native uses packages like @react-native-firebase/messaging for push notifications.
1. Project Setup
npx react-native init PushNotificationDemo
cd PushNotificationDemo
npm install @react-native-firebase/app @react-native-firebase/messaging
2. Configure Firebase
- Download google-services.json (Android) and GoogleService-Info.plist (iOS) from Firebase Console.
- Place them in platform-specific directories and update build.gradle and Info.plist.
3. Request Permissions (iOS)
import messaging from ‘@react-native-firebase/messaging’;
const requestUserPermission = async () => {
const authStatus = await messaging().requestPermission();
const enabled = authStatus === messaging.AuthorizationStatus.AUTHORIZED ||
authStatus === messaging.AuthorizationStatus.PROVISIONAL;
if (enabled) {
console.log(‘Authorization status:’, authStatus);
}
};
4. Listening for Messages
messaging().onMessage(async remoteMessage => {
console.log(‘A new FCM message arrived!’, remoteMessage);
});
Note: Background messages require a separate headless task setup in React Native.
Best Practices & Advanced Tips
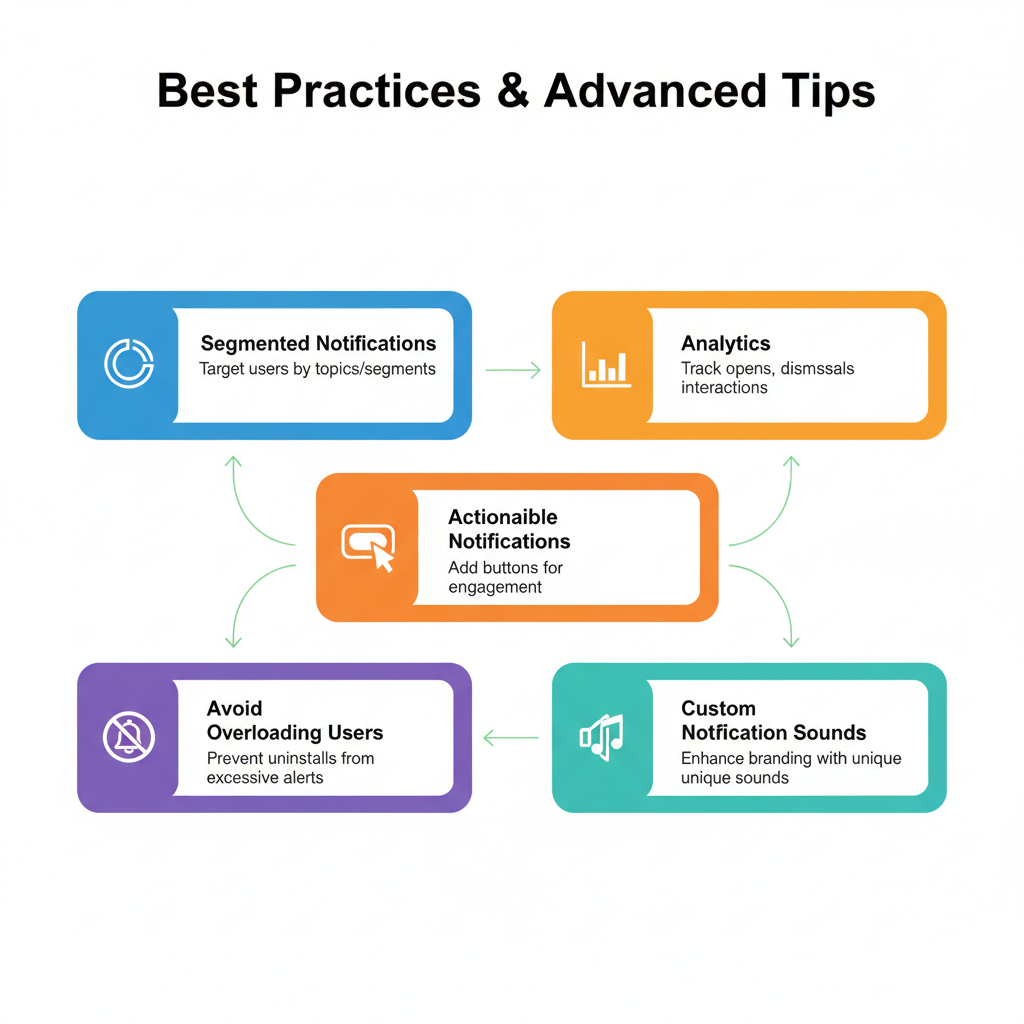
- Segmented Notifications: Use topics or user segments to send relevant notifications.
- Actionable Notifications: Include buttons or actions to improve engagement.
- Analytics: Track opens, dismissals, and interactions to optimize content.
- Avoid Overloading Users: Excessive notifications can lead to uninstalls.
- Custom Notification Sounds: Enhance branding with unique notification sounds.
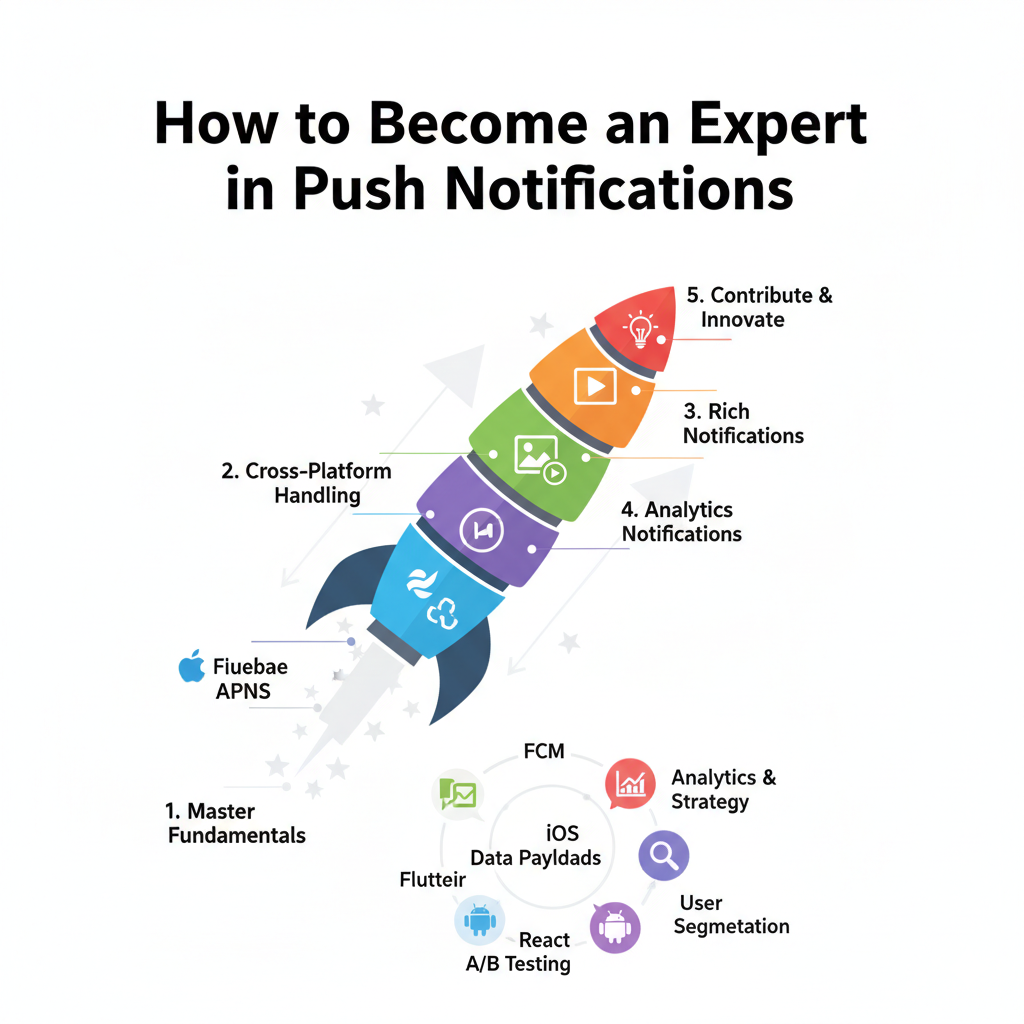
How to Become an Expert in Push Notifications
- Master Firebase Cloud Messaging and APNS.
- Practice cross-platform handling—distinguishing between iOS and Android behaviors.
- Implement rich notifications with images, actions, and media.
- Learn analytics-driven strategies to maximize engagement.
- Contribute to open-source packages or write tutorials on real-world implementations.
Integrating CuriosityTech
At Curiosity Tech (Website:https://curiositytech.in), we provide comprehensive guidance on Flutter and React Native development. Our team, reachable at +91-9860555369 or contact@curiositytech.in, specializes in crafting mobile apps that implement robust push notification systems and advanced features. Visit us at 1st Floor, Plot No 81, Wardha Rd, Gajanan Nagar, Nagpur, or follow our updates on Instagram: curiositytechpark, LinkedIn: Curiosity Tech, and Facebook: Curiosity Tech to stay ahead in cross-platform mobile trends.
Conclusion
Push notifications are more than just alerts—they are a channel to engage, retain, and delight users. Whether using Flutter or React Native, understanding both the conceptual flow and practical implementation ensures that your apps are responsive, user-friendly, and reliable. Mastering push notifications is a step toward becoming a skilled cross-platform mobile developer.