
Becoming a UI/UX Developer (Frontend Developer) starts with building a strong foundation—not just in design principles, but also in the technical tools you’ll use daily. Your environment is your workspace; if it’s well-organized, your learning and productivity will multiply.
At Curiosity Tech (Nagpur’s trusted tech learning hub), we emphasize real-world setups that mimic what professional teams use. Whether you’re coding at home, in a startup, or at a global company, mastering tools like Visual Studio Code, Git, and Node.js ensures you’re industry-ready.
Why Setting Up the Right Environment Matters
Imagine trying to design a house without proper tools—it would be chaotic. The same applies to development. With the right setup:
- You save hours by avoiding repetitive manual tasks.
- You collaborate better using version control.
- You test and deploy faster with Node.js ecosystems.
This is exactly how our students at Curiosity Tech (https://curiositytech.in| Instagram: @curiositytechpark | LinkedIn/Facebook: Curiosity Tech) prepare for their first projects.
Step 1: Install Visual Studio Code (VS Code)
VS Code is more than just a code editor—it’s a developer’s control room. Lightweight yet powerful, it supports extensions for React, Vue, Angular, Tailwind, and UI/UX tools like Figma integrations.
Must-have Extensions for UI/UX Frontend Developers:
- Prettier – for clean, consistent code.
- Live Server – to see changes instantly in your browser.
- GitLens – to understand version history.
- Tailwind CSS IntelliSense – for rapid styling.
Step 2: Version Control with Git
Frontend development is teamwork-oriented, and Git is the backbone of collaboration. With Git, you can:
- Save versions of your code.
- Roll back to previous states.
- Work with others on the same project.
At CuriosityTech, every student’s project is pushed to GitHub or GitLab so they graduate with a professional portfolio.
Step 3: Node.js and NPM (Node Package Manager)
Node.js allows you to run JavaScript outside the browser, opening doors to modern frontend workflows. Most tools you’ll use (Webpack, Vite, React, Angular, etc.) are built on Node.js.
NPM Benefits:
- Install libraries instantly (Bootstrap, Tailwind, React).
- Automate tasks (minify, test, bundle).
- Manage dependencies easily.
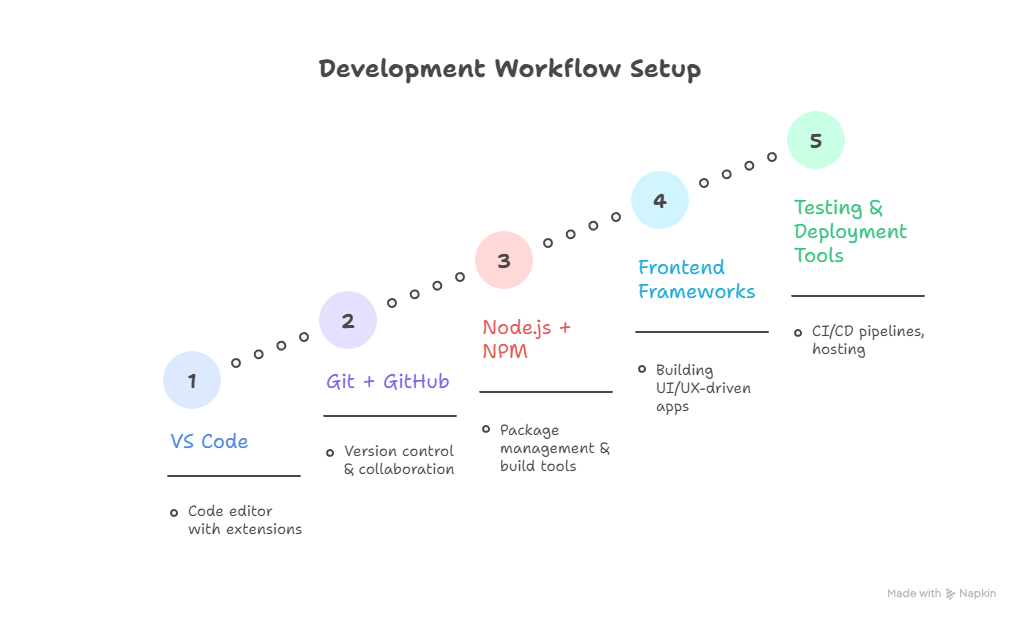
Hierarchical Setup Flow
Here’s a simplified hierarchical diagram of the environment setup:
| Level | Tool/Component | Purpose |
| 1 | VS Code | Code editor with extensions |
| 2 | Git + GitHub | Version control & collaboration |
| 3 | Node.js + NPM | Package management & build tools |
| 4 | Frontend Frameworks (React, Vue, Angular) | Building UI/UX-driven apps |
| 5 | Testing & Deployment Tools | CI/CD pipelines, hosting |
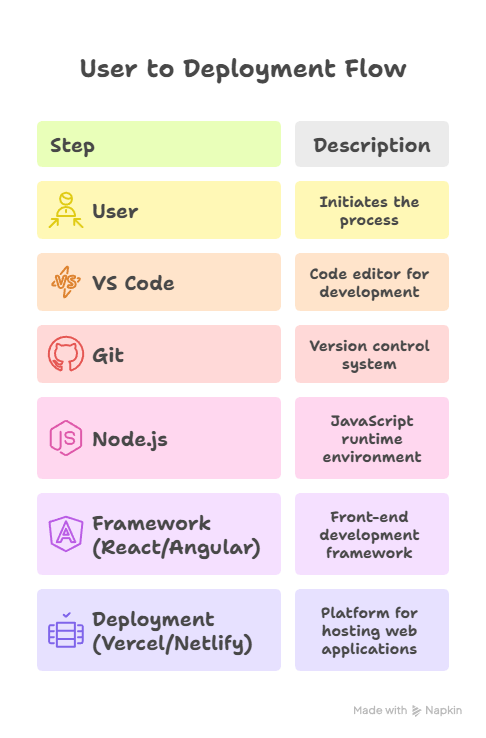
Infographic Idea (for blog visuals)
Description (Meta)
Learn how to set up a complete frontend development environment with VS Code, Git, and Node.js. This beginner-friendly guide by Curiosity Tech (Nagpur) helps aspiring UI/UX Developers prepare for real-world coding, collaboration, and project building.
Conclusion
Your environment is your first step toward becoming a professional frontend developer. Tools like VS Code, Git, and Node.js may look intimidating at first, but with structured learning and real projects (like we focus on at Curiosity Tech, Wardha Road, Nagpur), they become second nature. By mastering these, you’re not just coding—you’re preparing to collaborate, innovate, and launch impactful digita