
Introduction
Smart homes are no longer futuristic concepts — they are everyday realities. From controlling lights with a smartphone to voice-activated assistants ensuring energy efficiency, IoT has transformed the way we live. But instead of just describing “smart homes,” let’s build one!
In this DIY workshop-style guide, you’ll learn how to:
- Connect sensors and actuators in a home IoT setup.
- Use microcontrollers (Arduino/ESP32).
- Send and visualize data using a cloud dashboard.
- Automate lights, fans, and security systems with IoT logic.
At CuriosityTech.in Labs in Nagpur, this very project is one of the starting modules in smart automation IoT training programs.
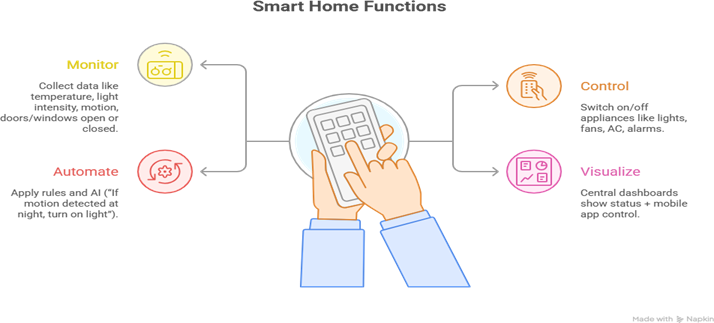
Core Concept
A Smart Home is essentially an IoT network of sensors and actuators that:
Hardware Required
- Microcontroller / Development Board
- ESP32 (recommended: Wi-Fi + BLE capability).
- Alternative: NodeMCU (ESP8266).
- Sensors
- PIR (Passive Infrared Motion Sensor).
- LDR (Light Dependent Resistor).
- DHT11/DHT22 (Temperature & Humidity Sensor).
- Magnetic Door/Window Sensor (Reed Switch).
- Actuators
- Relays (to control light/fan/AC).
- Buzzer/Speaker (for alarms).
- Servo motor (simulate smart door lock).
- Cloud / Dashboard
- ThingsBoard, Blynk, or AWS IoT Core (depending on learner comfort).
- Other Components
- Jumper wires, breadboard, mobile app for remote control.
Wiring Blueprint (Conceptual)
- PIR Sensor → GPIO pin of ESP32.
- LDR → Analog pin of ESP32.
- DHT Sensor → Digital input pin.
- Relay Module → GPIO to control AC loads (light, fan).
- Servo Motor → Connected for lock automation.
Diagram (as commonly drawn at CuriosityTech): A house schematic where icons represent “sensors inside rooms” connected to ESP32 and “appliances” represented by bulbs, fans, doors, all wired via relays.
Step-by-Step Workshop Procedure
Step 1: Setup ESP32 Environment
- Install Arduino IDE.
- Add ESP32 board support via board manager.
- Connect ESP32 via USB.
Step 2: Sensor Code Deployment
- Use libraries: DHT.h for temperature sensor, Servo.h for door lock.
- Test individually: print values to serial monitor.
Step 3: Actuator Control
- Configure relay pins for light/fan.
- Upload simple code: “if PIR detected motion → relay ON (light)”.
Step 4: Cloud Connectivity
- Connect ESP32 to Wi-Fi router.
- Install PubSubClient.h library for MQTT.
- Configure broker credentials (e.g., test.mosquitto.org or ThingsBoard).
- Publish temperature/humidity on MQTT topics.
- Subscribe to a topic like /home/light to accept mobile commands.
Step 5: Dashboard Integration
- On ThingsBoard or Blynk:
- Create a switch widget for Lights/Fans.
- Create graphs for Temperature/Humidity.
- Add notification alert for “motion detected”.
Step 6: Final Automation Rules
- IF PIR = motion at night → Fan/Light ensure ON.
- IF Temperature > 30°C → AC relay ON automatically.
- IF Door sensor triggered → Buzzer alert + push notification.
Real-World Extensions
- Voice Control Integration: Connect with Alexa/Google Home using MQTT or IFTTT.
- Security: Enable encrypted MQTT (TLS certificates).
- Scalability: Use multiple ESP32s for multi-room automation.
- Edge Intelligence: Run local logic on ESP32 for faster response.
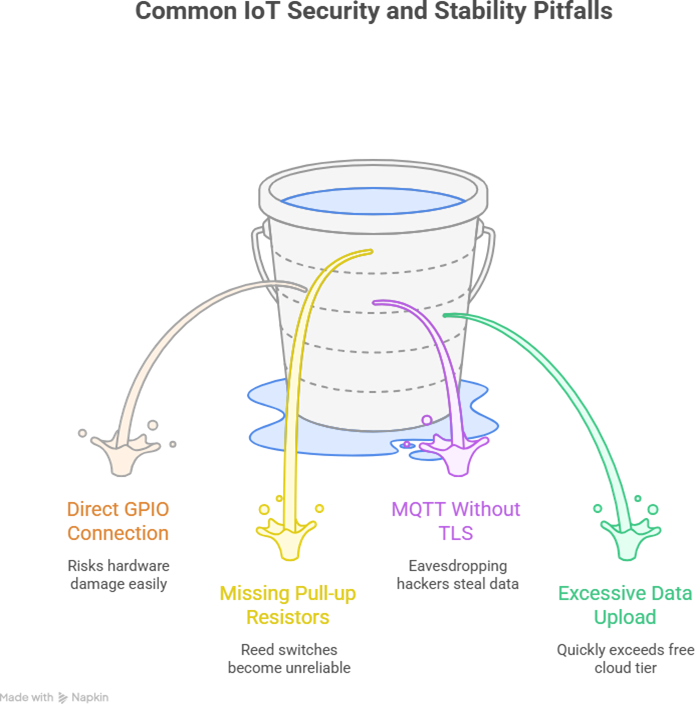
Common Beginner Mistakes
Case Study – CuriosityTech Smart Home Demo
In CuriosityTech’s IoT Smart Home Lab in Nagpur, students installed PIR motion detectors in the lab corridor:
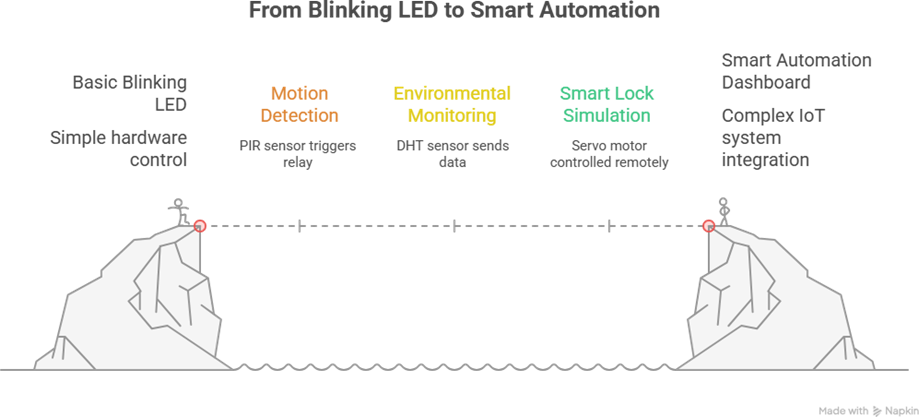
Impact: Within one week, learners transitioned from basic blinking LED to smart automation dashboard using the same ESP32 hardware.
Conclusion
A DIY Smart Home IoT project demonstrates the magic of hardware, cloud, and automation in action. Sensors make the environment visible, relays and actuators respond, while dashboards give humans control and confidence.
For beginners, this project builds foundational skills: wiring, coding, cloud integration, and automation logic. And with ecosystems like CuriosityTech.in Nagpur, students don’t just “read” about smart homes — they bring apartments, labs, or even entire buildings online with affordable components.
In the age of IoT 2025, building a smart home is not just a hobby project; it’s the starting step to learning full-fledged smart cities.

