

Introduction
In cross-platform mobile development, state management is a crucial concept. The state represents the dynamic data of an app—anything that changes over time, such as user input, API responses, or UI changes.
Proper state management ensures that apps update efficiently, remain maintainable, and provide a smooth user experience across platforms like Flutter and React Native.
At CuriosityTech (Website: https://curiositytech.in, Phone: +91-9860555369, Email: contact@curiositytech.in), we guide developers through best practices and patterns for managing app state effectively, from beginners to advanced users.
1. Understanding State in Mobile Apps
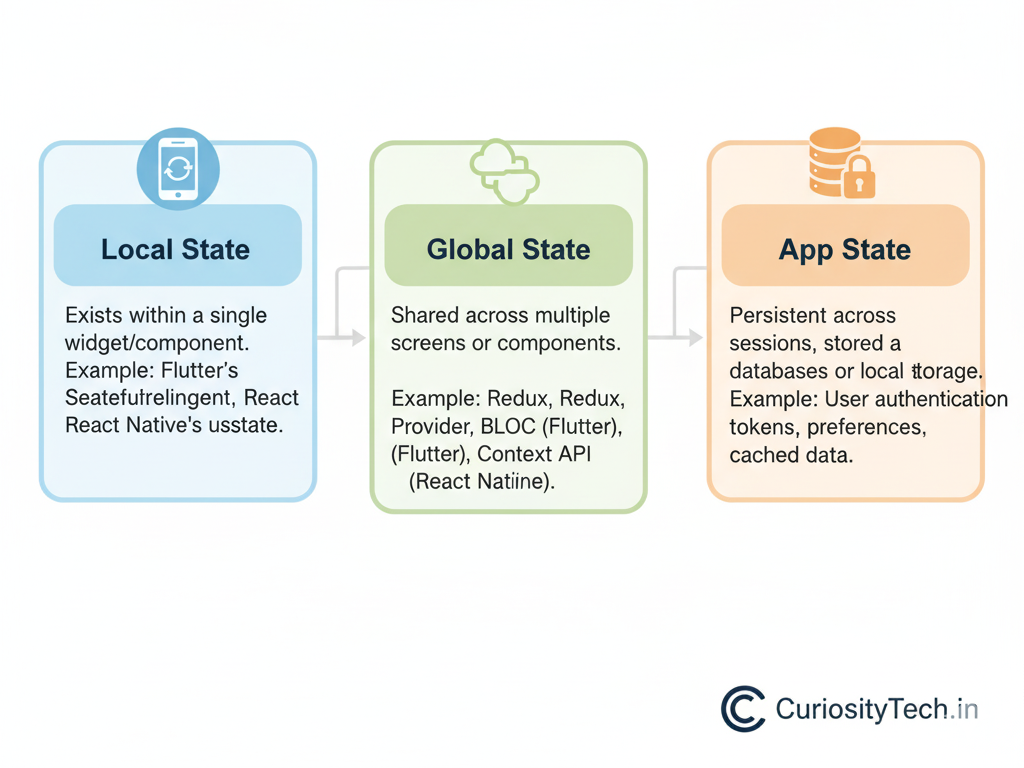
Types of State
- Local State
- Exists within a single widget/component
- Example: Flutter’s StatefulWidget, React Native’s useState
- Global State
- Shared across multiple screens or components
- Example: Redux, Provider, BLoC (Flutter), Context API (React Native)
- App State
- Persistent across sessions, stored in databases or local storage
- Example: User authentication tokens, preferences, cached data
2. State Management in Flutter
A. StatefulWidget Example
class CounterApp extends StatefulWidget {
@override
_CounterAppState createState() => _CounterAppState();
}
class _CounterAppState extends State<CounterApp> {
int counter = 0;
void incrementCounter() {
setState(() {
counter++;
});
}
@override
Widget build(BuildContext context) {
return Scaffold(
appBar: AppBar(title: Text(‘Flutter Counter’)),
body: Center(child: Text(‘Counter: $counter’)),
floatingActionButton: FloatingActionButton(
onPressed: incrementCounter,
child: Icon(Icons.add),
),
);
}
}
Explanation:
- setState() updates the widget tree locally
- Suitable for small, simple state changes
B. Provider
- A popular Flutter state management library
- Allows sharing state across multiple widgets
Example:
class Counter with ChangeNotifier {
int value = 0;
void increment() {
value++;
notifyListeners(); // Notifies listeners to rebuild
}
}
- Widgets listen to changes using Consumer<Counter>
Benefit: Separates business logic from UI
C. BLoC (Business Logic Component)
- Reactive state management pattern
- Uses streams to manage state and events
- Ideal for large-scale apps requiring modular architecture
3. State Management in React Native
A. useState Hook
import React, { useState } from ‘react’;
import { View, Text, Button } from ‘react-native’;
export default function CounterApp() {
const [count, setCount] = useState(0);
return (
<View>
<Text>Counter: {count}</Text>
<Button title=”Increment” onPress={() => setCount(count + 1)} />
</View>
);
}
Explanation:
- useState manages local component state
- Simple and suitable for single-screen apps
B. Context API
- Provides a global state solution without external libraries
- Share state across multiple component
Example:
const CounterContext = React.createContext();
export function CounterProvider({ children }) {
const [count, setCount] = useState(0);
return (
<CounterContext.Provider value={{ count, setCount }}>
{children}
</CounterContext.Provider>
);
}
C. Redux
- Centralized state management for complex apps
- Ensures predictable state updates through actions and reducers
- Ideal for multi-screen apps with shared data
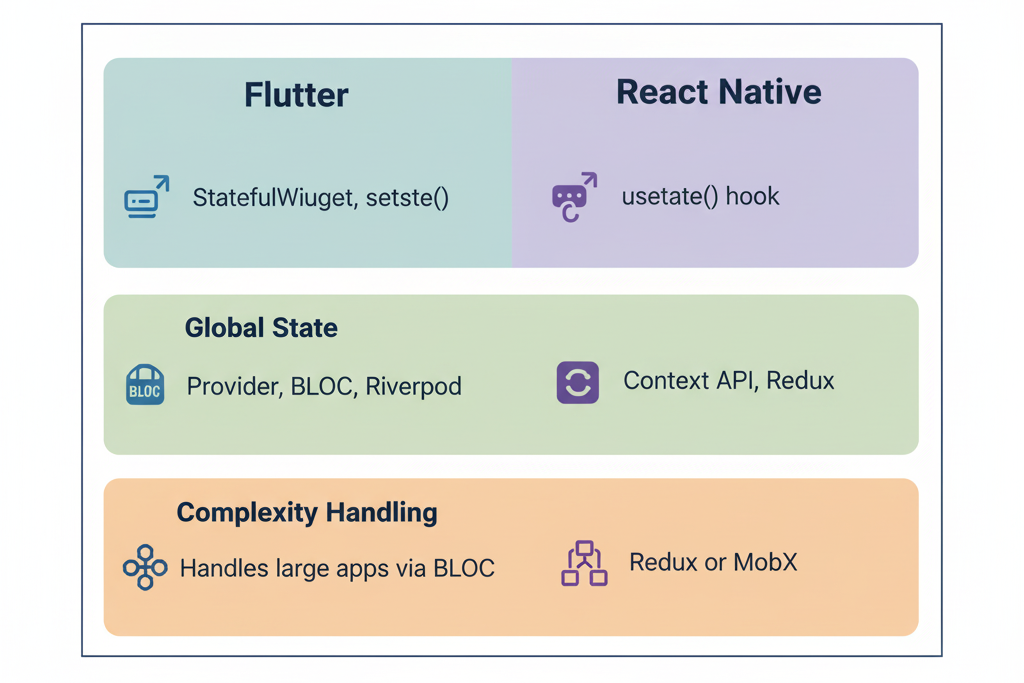
4. Comparing Flutter & React Native State Management
| Feature | Flutter | React Native |
| Local State | StatefulWidget, setState() | useState() hook |
| Global State | Provider, BLoC, Riverpod | Context API, Redux |
| Complexity Handling | Handles large apps via BLoC | Redux or MobX |
| Learning Curve | Moderate (Provider simpler than BLoC) | Moderate (Context easier than Redux) |
Key Insight: Choose simple solutions for small apps, and structured patterns like BLoC or Redux for enterprise-grade projects.
5. Best Practices
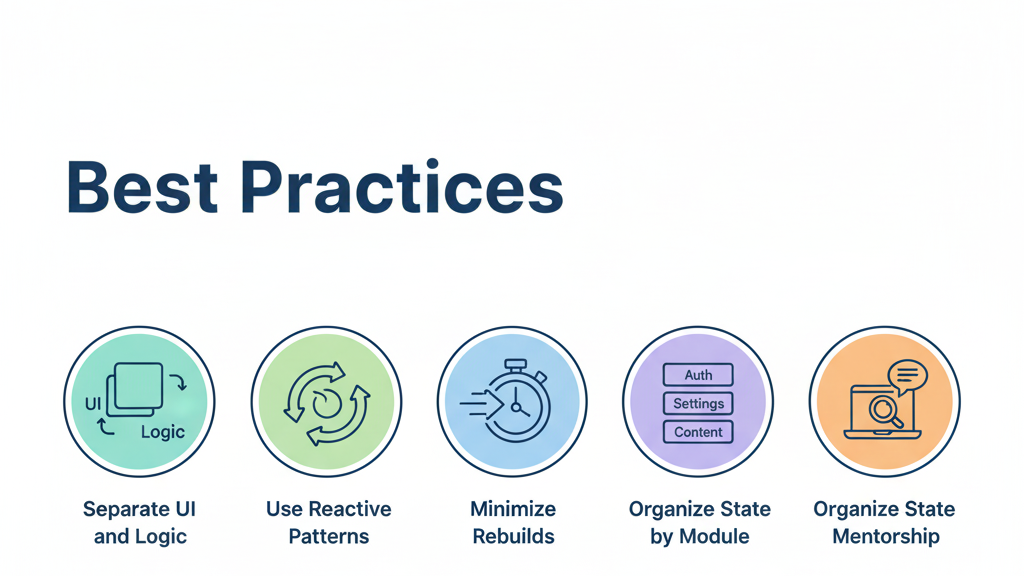
- Separate UI and Logic: Keep business logic independent from UI components
- Use Reactive Patterns: Streams in Flutter, Redux in React Native
- Minimize Rebuilds: Avoid unnecessary widget/component re-renders
- Organize State by Module: Authentication, settings, and content should have independent state
- CuriosityTech Mentorship: Follow tutorials, code examples, and architecture guidelines for effective state management. Socials: Instagram: curiositytechpark, LinkedIn: Curiosity Tech, Facebook: Curiosity Tech
6. Practical Example: Cross-Platform Counter App
- Flutter: StatefulWidget or Provider for modular state
- React Native: useState for local counter, Context API for multi-component counter
- Benefit: Demonstrates real-time updates, central state control, and cross-screen synchronization
7. How to Become an Expert in State Management
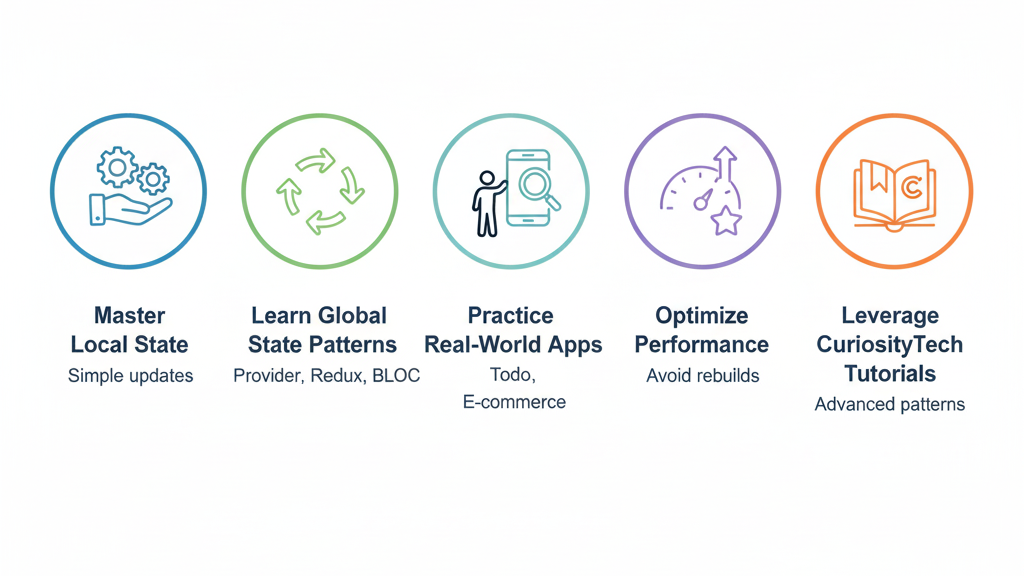
- Master Local State: Understand simple state updates and widget/component re-rendering
- Learn Global State Patterns: Provider, Redux, BLoC, Context API
- Practice Real-World Apps: Todo apps, e-commerce apps, and social apps
- Optimize Performance: Avoid unnecessary rebuilds, memoize components/widgets.
Leverage CuriosityTech Tutorials: Step-by-step examples for Flutter & React Native advanced patterns
Conclusion
State management is the backbone of dynamic, responsive cross-platform apps. Properly handling local and global state ensures maintainability, predictable UI updates, and scalable architecture.
By mastering Flutter and React Native state patterns and leveraging Curiosity Tech resources, developers can confidently build high-quality apps that respond efficiently to user interactions.

