
Introduction
Deploying your first Java web application is a major milestone for any Java Full Stack Developer. While building apps locally is important, understanding how to host and run them on a server is what makes you a professional. Apache Tomcat is one of the most widely used servers for deploying Java web applications.
At CuriosityTech.in, we train developers not just to code, but to deploy production-ready applications. Deploying to Tomcat ensures your Spring Boot or JSP-based applications are accessible to users over a network or the internet.
Why Deployment Matters
- Real-World Testing: Validate your application in an environment similar to production.
- Accessibility: Make your application accessible to clients, teammates, or end-users.
- Professional Development: Deployment skills are crucial for interviews and career growth.
- Integration: Connect with other services like databases, REST APIs, and cloud resources.
CuriosityTech.in ensures developers learn hands-on deployment, so their projects are industry-ready from day one.
Step 1: Install Apache Tomcat
- Download the latest Tomcat version from Apache Tomcat Downloads.
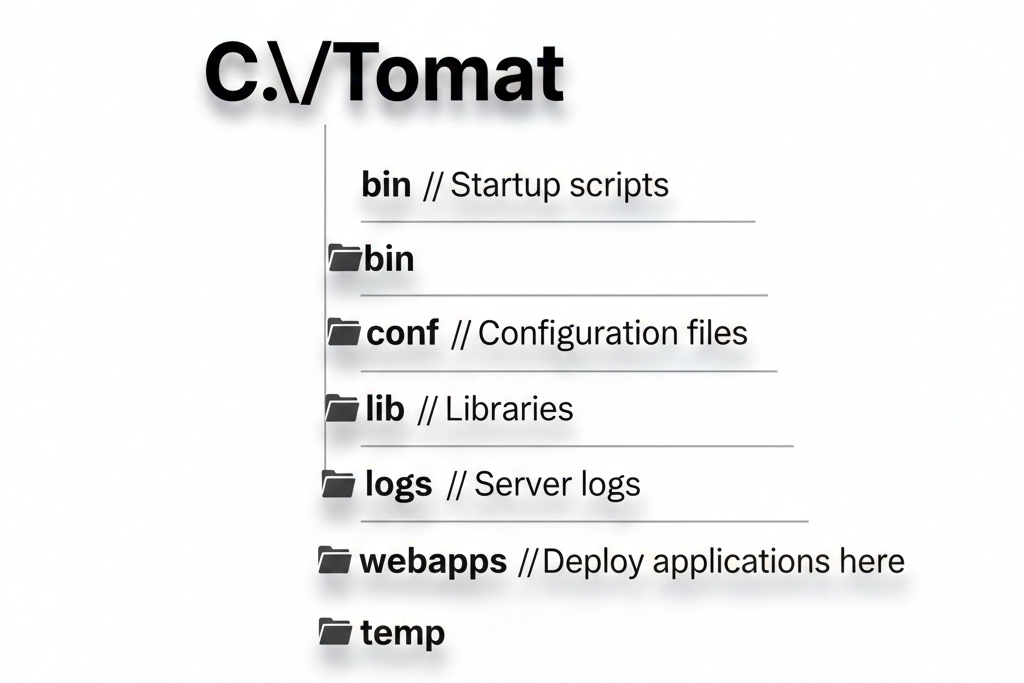
- Extract the folder to your preferred directory (e.g., C:\Tomcat).
- Set CATALINA_HOME environment variable pointing to the Tomcat directory.
Directory Structure:
Step 2: Package Your Java Application
For Spring Boot apps, package as a WAR file:
mvn clean package
- The WAR file will be in the target folder.
- For Servlet/JSP apps, compile and create WAR manually or via IDE like Eclipse/IntelliJ.
Step 3: Deploy to Tomcat
- Copy the WAR file into the webapps folder.
- Start Tomcat using:
- Windows: bin\startup.bat
- Linux/Mac: bin/startup.sh
Access your application in a browser:
http://localhost:8080/your-app-name
Step 4: Configuring Context and Ports
- Edit conf/server.xml to change ports or define context paths:
<Connector port=”8080″ protocol=”HTTP/1.1″
connectionTimeout=”20000″
redirectPort=”8443″ />
<Context path=”/myapp” docBase=”myapp.war” reloadable=”true” />
- Ensure ports are open for network access.
Diagram: Deployment Workflow

Description :- This workflow shows how code flows from your local development environment to Tomcat, and finally becomes accessible to users.
Step 5: Best Practices
- Keep logs organized (logs/catalina.out) for debugging.
- Use environment variables for sensitive data (DB credentials, API keys).
- Test application thoroughly before deployment.
- Automate deployment using CI/CD tools (Jenkins, GitHub Actions).
- Regularly update Tomcat to patch security vulnerabilities.
Integrating CuriosityTech Perspective
At CuriosityTech.in, deployment is taught as a critical skill. Developers learn to deploy Java apps to local Tomcat, then scale to cloud environments like AWS EC2 or Azure App Services. This hands-on experience ensures students bridge the gap between coding and production-ready applications.
Conclusion
Deploying a Java application on Tomcat is more than just moving files—it’s about understanding server architecture, configuring your environment, and preparing applications for real-world use. Mastering deployment transforms a developer from someone who writes code to someone who delivers working applications. With CuriosityTech.in’s guidance, you gain practical deployment experience that is crucial for career growth as a Java Full Stack Developer.