

Introduction
React Native, created by Facebook, allows developers to build cross-platform mobile apps using JavaScript. It bridges the gap between web development skills and mobile app development, enabling developers to write a single codebase that runs on iOS and Android.
At CuriosityTech (Website: https://curiositytech.in, Phone: +91-9860555369, Email: contact@curiositytech.in), we help developers transform their JavaScript knowledge into mobile app expertise, providing step-by-step tutorials, best practices, and hands-on examples.
This guide introduces React Native basics, environment setup, and building your first interactive mobile app.
1. Setting Up React Native Environment
Before coding, ensure your environment is ready.
Tools Required
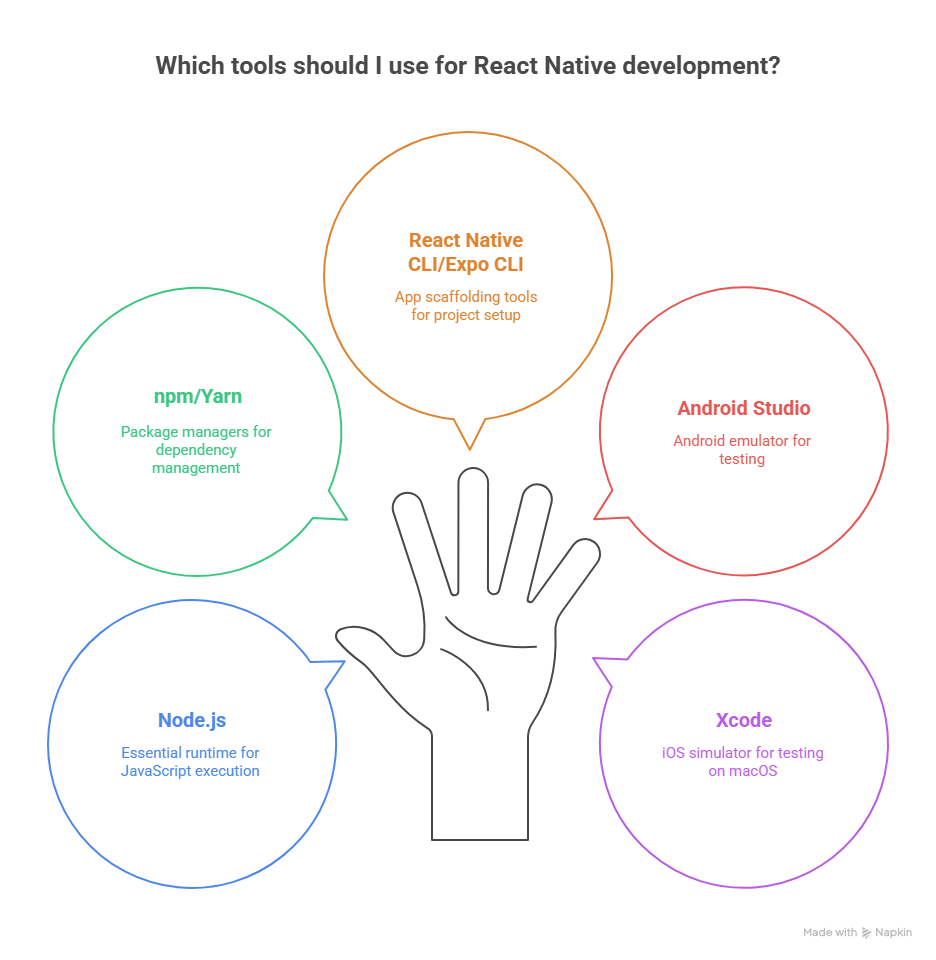
Install React Native CLI
npm install -g react-native-cli
Create a New Project
npx react-native init CuriosityApp
cd CuriosityApp
npx react-native run-android # or run-ios
2. React Native Components
Core Components
React Native uses components as the building blocks of mobile apps.
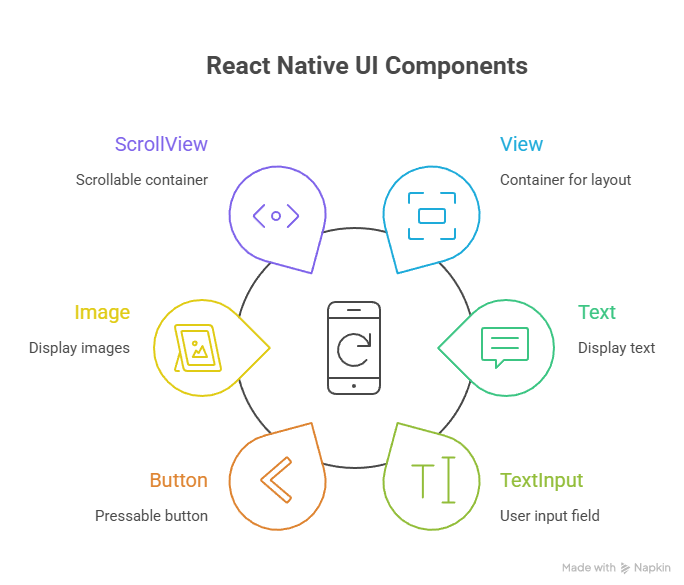
Key Concept: React Native uses JSX (JavaScript XML) syntax, similar to React for web, allowing developers to write UI in a declarative style.
3. Building Your First App
App.js Example
import React, { useState } from ‘react’;
import { View, Text, Button, StyleSheet } from ‘react-native’;
export default function App() {
const [count, setCount] = useState(0);
return (
<View style={styles.container}>
<Text style={styles.text}>Welcome to CuriosityTech!</Text>
<Text style={styles.counter}>Counter: {count}</Text>
<Button title=”Increment” onPress={() => setCount(count + 1)} />
</View>
);
}
const styles = StyleSheet.create({
container: {
flex: 1,
justifyContent: ‘center’,
alignItems: ‘center’,
},
text: {
fontSize: 24,
marginBottom: 20,
},
counter: {
fontSize: 20,
marginBottom: 10,
},
});
Explanation:

This app demonstrates a dynamic counter, a foundational example for learning interactive components.
4. Navigation Basics
Most mobile apps require navigation between screens. React Navigation is the standard library.
Installation
npm install @react-navigation/native
npm install react-native-screens react-native-safe-area-context
Simple Stack Navigator
import { NavigationContainer } from ‘@react-navigation/native’;
import { createStackNavigator } from ‘@react-navigation/stack’;
import DetailsScreen from ‘./DetailsScreen’;
import DetailsScreen from ‘./DetailsScreen’;
const Stack = createStackNavigator();
export default function App() {
return (
<NavigationContainer>
<Stack.Navigator>
<Stack.Screen name=”Home” component={HomeScreen} />
<Stack.Screen name=”Details” component={DetailsScreen} />
</Stack.Navigator>
</NavigationContainer>
);
}
Explanation:
- NavigationContainer manages app navigation state
- Stack.Navigator defines stack-based screen transitions
- Enables smooth back-and-forth screen movement
5. Styling in React Native
React Native uses JavaScript objects for styling, similar to CSS.
Example
const styles = StyleSheet.create({
container: { flex: 1, justifyContent: ‘center’, alignItems: ‘center’ },
text: { fontSize: 24, color: ‘#333’ },
});
Best Practices:
- Use flexbox for layouts
- Define reusable styles to maintain consistency
- Keep styles modular and separate from component logic
6. How to Become an Expert in React Native
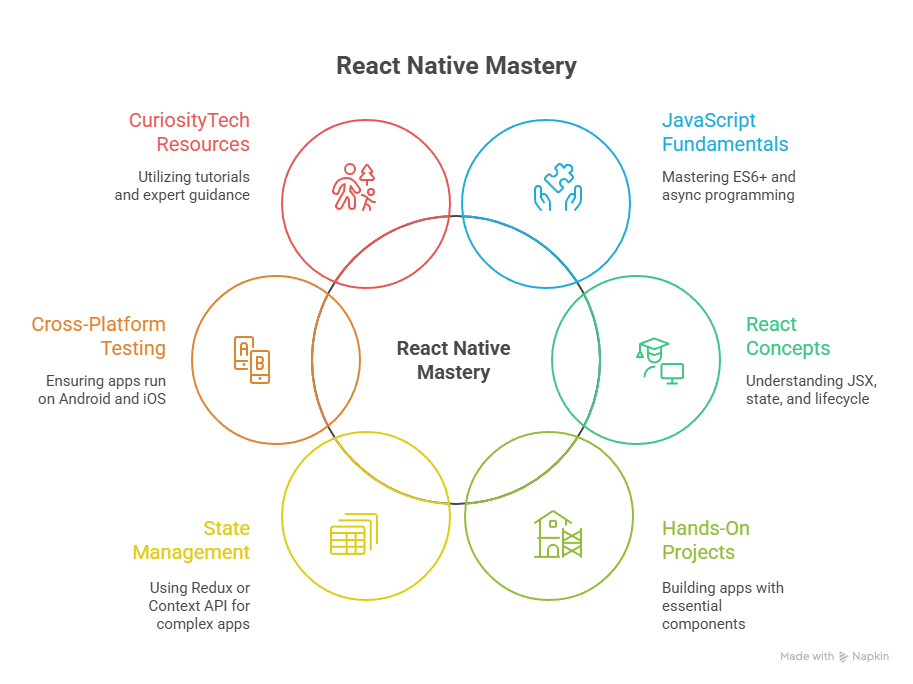
Conclusion
React Native empowers developers to build cross-platform mobile apps using JavaScript, offering rapid development cycles and reusable code. By understanding components, state management, navigation, and styling, beginners can start building functional, interactive apps immediately.
With guidance from CuriosityTech, developers can advance from simple apps to professional, production-ready cross-platform applications efficiently.

