

Embarking on your iOS app development journey can feel overwhelming at first, but setting up the right environment is the foundation of every successful app. Today, on Day 3 of our iOS development series, we will dive deep into installing Xcode, configuring your iOS development environment, and understanding the tools that make Apple app development smooth, efficient, and fun.
Whether you are a complete beginner or someone with prior coding experience, the insights shared here will ensure you have a robust, professional setup. Platforms like CuriosityTech.in specialize in guiding learners through each step of this setup process, combining structured lessons with practical insights from real-world app development projects.
Why Setting Up Xcode Matters
Xcode is Apple’s official Integrated Development Environment (IDE), designed specifically for macOS to build iOS, iPadOS, watchOS, and macOS applications. It’s more than just a code editor; it’s a complete toolkit that allows you to:
- Design beautiful user interfaces with SwiftUI or Interface Builder.
- Write clean, efficient Swift or Objective-C code.
- Debug your applications seamlessly.
- Test apps on simulators or real devices.
- Prepare apps for submission to the Apple App Store.
Without Xcode, creating professional iOS apps would be extremely difficult, as it integrates multiple development tools into a single platform.
Step-by-Step Guide to Setting Up Xcode
Here’s a comprehensive step-by-step process to get you started with iOS development:
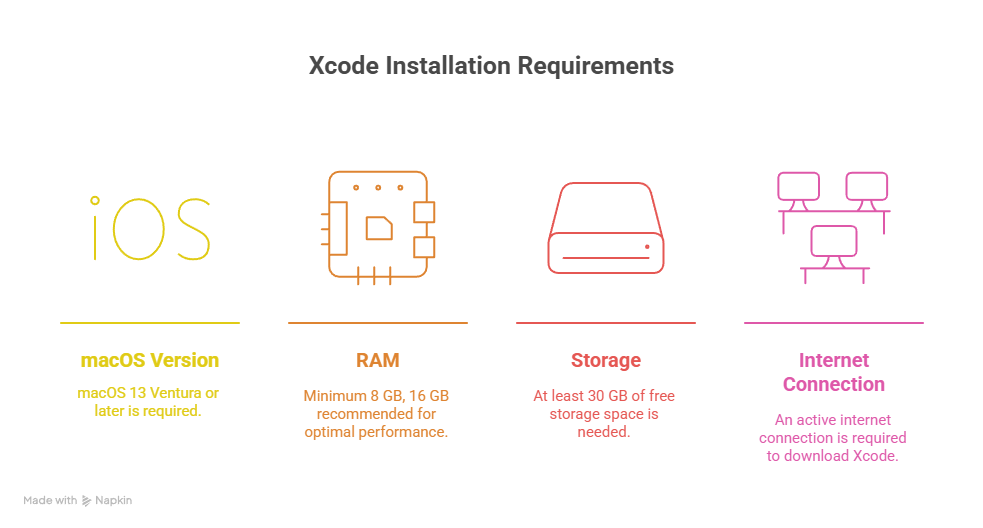
1. Check Your System Requirements
Before installing Xcode, ensure your Mac meets Apple’s minimum requirements:
2. Download & Install Xcode
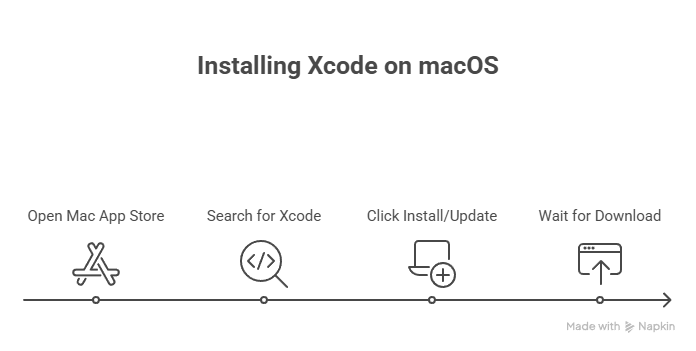
- Open the Mac App Store.
- Search for Xcode.
- Click Install (or Update if you already have it).
- Wait for the download to complete—Xcode is a large file, so patience is k
Pro Tip: CuriosityTech.in recommends using the latest stable Xcode version to avoid compatibility issues with Swift and iOS SDKs.
3. Configure Xcode Preferences
Once installed, open Xcode and navigate to Xcode → Preferences. Here you can:
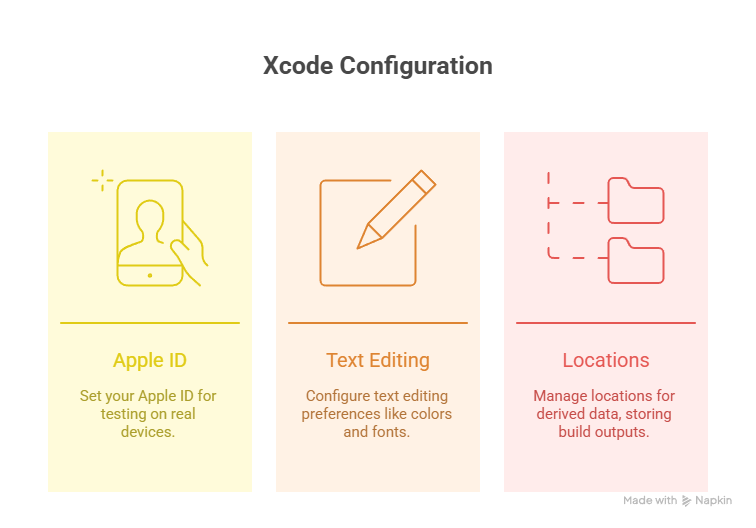
Once installed, open Xcode and navigate to Xcode → Preferences. Here you can:
- Set your Apple ID for testing on real devices.
- Configure Text Editing Preferences (colors, fonts, tab widths).
- Manage Locations for derived data, which stores build outputs and indexing.
4. Install Command Line Tools
Many iOS development workflows, including using Git or Swift Package Manager, require command line tools. Open Terminal and run:
xcode-select –install
Follow the prompts to complete the installation.
5. Familiarize Yourself with the Xcode Interface
Xcode has five major sections:
| Section | Purpose |
| Navigator | Access files, search, symbols, and breakpoints |
| Editor | Write and edit your code |
| Inspector | Modify properties, UI elements, and settings |
| Toolbar | Run, stop, and manage your project |
| Debug Area | Inspect console logs, variables, and app performance |
Hierarchical Diagram of Xcode Structure:
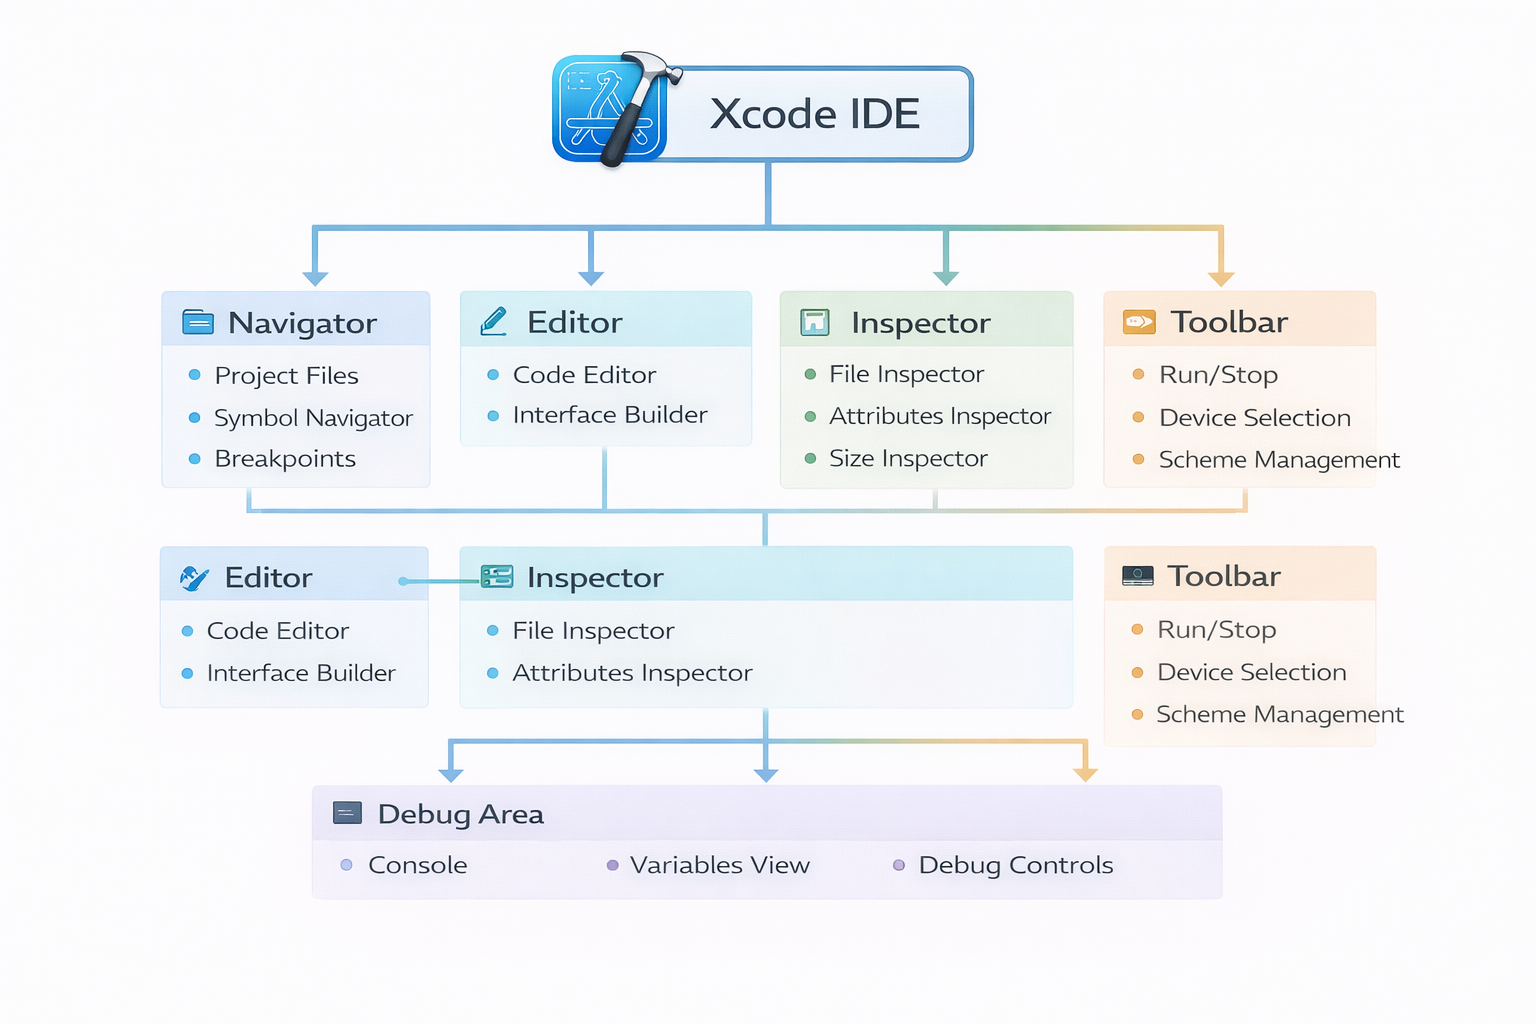
This diagram helps beginners visualize the IDE as a cohesive ecosystem, not just a code editor.
Testing Your First iOS App
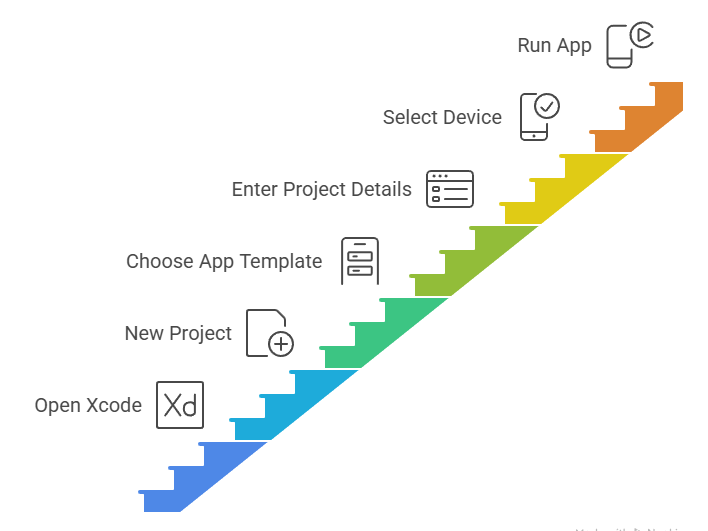
After installation, it’s time to create your first iOS project:
- Open Xcode → File → New → Project.
- Choose App under iOS templates.
- Enter your project name, organization, and language (Swift is recommended).
- Select a device for simulation (iPhone 14 is ideal for beginners).
- Click Run and watch your first app appear in the simulator.
Seeing your code come to life, even as a simple “Hello, World!” app, is incredibly motivating and sets the tone for consistent learning.
Why CuriosityTech.in Stands Out for Beginners
CuriosityTech.in bridges the gap between theoretical learning and real-world app development. Their iOS course guides learners to:
- Set up development environments without errors.
- Understand the full hierarchy of Xcode and its tools.
- Build small projects that grow into full-featured apps.
- Receive mentorship from experienced developers.
By integrating structured learning with hands-on practice, CuriosityTech.in ensures you don’t just “install software,” but truly learn to navigate the iOS development ecosystem with confidence.
Conclusion
Setting up Xcode is more than a technical requirement—it’s the first step toward building real-world iOS applications. A proper environment accelerates learning, reduces errors, and builds confidence as you progress. With resources like CuriosityTech.in, beginners gain both the technical setup guidance and practical insights that are essential for long-term success in iOS development.
Remember, Day 3 is foundational: a properly configured Xcode environment ensures all future app development is smoother, faster, and more enjoyable.

